17.4 MyID Operator Client advanced configuration
On the MyID web server, the OAuth2 authentication mechanism relies on the configuration of the URL that the end user will use to access the web server. The MyID Installation Assistant sets this up when you install MyID:
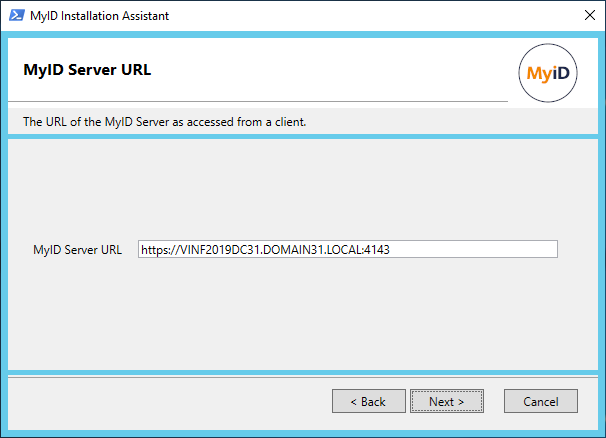
However, there may be some circumstances under which you need to amend this setting after installation. In this case, you can edit the configuration files for both web services.
17.4.1 The rest.core web service configuration file
The appsettings.json file contains the settings for the rest.core web service, and is located in the following folder by default:
C:\Program Files\Intercede\MyID\rest.core\
The MyID:Auth:AuthServerUrl setting provides the URL of web.oauth2 web service. At runtime, the rest.core web service carries out a request to this URL to interact with the web.oauth2 service. If it cannot perform this request, there will be a 500 server error.
The URL must be resolvable on the web server, and https (TLS) must be used.
There are various cases why this might not be resolvable
- The web server does not trust its own TLS certificate – the solution is to ensure the TLS certificate is trusted on the web server.
- The origin (DNSName) in the TLS certificate does not match the origin within the URL of the https request.
- The origin in the URL is not resolvable on the web server (it cannot see itself). This can be diagnosed with ping. If necessary, one possible solution is to use the hosts file on the web server to ensure the web server's address resolves to its own IP address.
- An attempt is being made to use http rather than https. OAuth2 requires https, so the rest.core and web.oauth2 web services are configured at installation to require https.
Important: The URL settings are updated when you run the installation program. If you have made any manual changes to the appsettings.json file, these are overwritten by the values you provide in the installer.
17.4.2 The web.oauth2 web service configuration file
The appsettings.json file contains the settings for the web.oauth2 web service, and is located in the following folder by default:
C:\Program Files\Intercede\MyID\web.oauth2
In the Clients section, for the "ClientId": "myid.operatorclient", the RedirectUris setting contains a list of URLs. These are the URLs to which the oauth2 protocol is allowed to redirect back.
The list must contain an entry that represents the URL that the end user will use in the browser to reach the MyID Operator Client. If the URL does not match, when you attempt to sign in, you will see an error similar to:
Sorry, there was an error : unauthorized_client
Important: The URL settings are updated when you run the installation program. If you have made any manual changes to the appsettings.json file, these are overwritten by the values you provide in the installer.
17.4.3 Displaying images stored on the web server
By default, MyID stores images in the database. If your system has any images on the web server (for example, if you have an upgraded system, where previously-captured images are on the web server while new images are stored in the database), you must configure the rest.core web service with the image location to allow the MyID Operator Client to display the images that are stored on the web server.
Important: Do not switch your system to storing images on the web server if you are using the MyID Operator Client to capture images. The MyID Operator Client will experience errors if you attempt to capture images when your system is configured to store images on the web server.
Edit the appsettings.Production.json file, which is the override file for the appsettings.json file, and is located in the following folder by default:
C:\Program Files\Intercede\MyID\rest.core\
If you do not have an appsettings.Production.json file already, you must create one, containing the following:
{
"MyID": {
"UpimagesFolder": "",
}
}
If you do have an existing appsettings.Production.json file, you must add the UpimagesFolder entry to the MyID section.
In the MyID section, change the UpimagesFolder entry to point to the directory that contains the images; for example:
"UpimagesFolder": "C:\\Program Files\\Intercede\\MyID\\Web\\WebPIV\\upimages",
Note: This is the default location; your system may have the images stored in a different location.
Make sure you escape all backslashes with backslashes, as in the example above.
Once you have saved the file, recycle the application pool to refresh the settings:
- On the MyID web server, in Internet Information Services (IIS) Manager, select Application Pools.
- Right-click the myid.rest.core.pool application pool, then from the pop-up menu click Recycle.
17.4.4 Changing the port
By default, the MyID Operator Client and its web service use port 8081. If you want to use a different port, after installing MyID and the MyID Client Service, you must edit configuration files on the client and on the web server.
Important: Back up your files before making any changes.
-
On each client PC using the MyID Operator Client:
-
Open the MyIDClientService.dll.config file in a text editor.
This file is located in the MyID Client Service program folder. By default, this is:
C:\Program Files (x86)\Intercede\MyIDClientService
-
Locate the following line:
<add key="WebSocketPort" value="8081"/>
-
Change the value to the port you want to use.
For example:
<add key="WebSocketPort" value="6066"/>
-
Save the configuration file.
-
-
On the web server:
-
Open the appSettings.js file in a text editor.
This file is located in the Operator Client web folder; by default, this is:
C:\Program Files\Intercede\MyID\OperatorClient
-
Locate the following line:
wsLocation: "ws://127.0.0.1:8081/"
-
Change the port number in the wsLocation parameter to the port you want to use.
For example:
wsLocation: "ws://127.0.0.1:6066/"
-
Open the appsettings.json file for the web.oauth2 web service in a text editor.
This file is located in the web.oauth2 folder; by default, this is:
C:\Program Files\Intercede\MyID\web.oauth2
-
Locate the following line in the "ApiResources": "ssaclient" section:
"port": 8081
-
Change the port number to the port you want to use.
For example:
"port": 6066
-
-
Reset the web server.
- On the MyID web server, in Internet Information Services (IIS) Manager, select Application Pools.
- Right-click the myid.rest.core.pool application pool, then from the pop-up menu click Recycle.
- Right-click the myid.web.oauth2.pool application pool, then from the pop-up menu click Recycle.
-
On each client PC using the MyID Operator Client, restart the MyID Client Service app:
-
Right-click the MyID Client Service icon in the task bar.
-
From the pop-up menu, click Exit.
-
Clear the browser cache.
-
Run the MyID Client Service App from the Windows Start menu.
-
Important: If you upgrade your MyID system, you must make these changes again.
Note: If you are using the MyID Client WebSocket Service to allow multiple instances of the MyID Client Service to work through a single WebSocket port, you must also set the WebSocket port in the MyID Client WebSocket Service configuration file to the same value; see the Updating the port and server details section in the Installation and Configuration Guide for details.
17.4.5 Load balancing
The MyID Operator Client and the rest.core web service are stateless, and do not have any session affinity; however, the web.oauth2 web service does have state:
-
It uses authentication cookies that cannot be shared between multiple server tiers; however, the lifetime of the authentication cookie is just the duration of the authentication, which typically takes a few seconds to complete.
-
It uses an RSA key (that by default it automatically generates the first time it runs) that is used to sign the JWT tokens. If there are multiple web.oauth2 instances on different servers, without additional configuration they will each use a different signing key, and therefore each instance will be its own authentication service that is independent from the other instances. This would mean that each client of the web.oauth2 server must target that individual instance, not the load balanced front-end. However; it is possible to configure multiple web.oauth2 instances to share the same key.
There are the following options for managing load balancing:
-
The load balancer ties each client to a specific server.
If a specific client computer is always redirected to the same server, and that server is used to return all websites and web services (operator client, rest.core, web.oauth2) then each web server can work independently.
Note: In this configuration, any third-party systems that are using the web.oauth2 service themselves for authentication would need to target a specific instance rather than the load-balanced front end.
-
The load balancer provides browser session affinity for web.oauth2 (but each web.oauth2 shares the same signing key).
This is the preferred configuration for multiple servers hosting web.oauth2. In this configuration, you generate a JWT signing key and share it with all instances of web.oauth2 on all servers. All web.oauth2 servers are therefore signing with the same signing key.
In the appsettings.Production.json configuration file, there are settings under MyID:JwtSigner that you can change to configure the web.oauth2 server to use a specified key or certificate (which you can generate separately).
To configure session affinity and a shared signing key for your web.oauth2 servers:
-
Run the following PowerShell script:
$subject = "JWS Signer Certificate"
$expiry = (Get-Date).AddYears(20)
New-SelfSignedCertificate -Type Custom -subject $subject -notafter $expiry -KeyUsage DigitalSignature -KeyAlgorithm RSA -KeyLength 2048 -CertStoreLocation cert:\CurrentUser\MyNote: This example uses a certificate with a lifetime of 20 years. The certificate must be replaced before it expires. You can set this to a length that suits your organization's needs by editing the $expiry line in the PowerShell script.
-
Take a note of the certificate thumbprint that is produced by the script.
-
Export the certificate as a PFX file:
-
Prepare the following PowerShell script, making the appropriate substitutions:
$CertPassword = ConvertTo-SecureString -String "pfxpassword" -Force -AsPlainText
Export-PfxCertificate -Cert cert:\CurrentUser\My\CertThumbprint -FilePath jwtsigningkey.pfx -Password $CertPasswordSet the following substitutions:
-
pfxpassword – Choose a strong PFX password. Make sure you take a note of this password.
-
CertThumbprint – Provide the certificate thumbprint generated above.
Alternatively, you can retrieve the thumbprint by viewing the certificate.
-
jwtsigningkey.pfx – Specify where you want the file to be created.
You must specify a path to which the user has write access.
-
-
Run the PowerShell script.
The script creates the PFX file.
Important: You must keep the PFX file and its password safe and secure.
-
-
On each web server:
-
Log on as the MyID web services user.
This is the user under which the web.oauth2 service runs.
-
Copy the PFX file onto the server.
-
At the Windows command prompt, run the following, providing the appropriate path and name for the PFX file:
certutil –csp "Microsoft Software Key Storage Provider" -user –importpfx jwtsigningkey.pfx
-
Add the thumbprint to the appsettings.Production.json file.
This is the override file for the appsettings.json file, and is located in the following folder by default:
C:\Program Files\Intercede\MyID\web.oauth2\
If you do not have an appsettings.Production.json file already, you must create one, containing the following:
{
"MyID": {
"JwtSigner": {
"ContainerName": "MyIDAuth JWT Signer",
"GenerateKey": true,
"Thumbprint": "<certificate thumbprint>"
}
}
}If the appsettings.Production.json file already exists, add the MyID:JwtSigner information to the existing file.
Replace <certificate thumbprint> with the thumbprint of the certificate you generated above.
-
Reset the web server:
- On the MyID web server, in Internet Information Services (IIS) Manager, select Application Pools.
- Right-click the myid.rest.core.pool application pool, then from the pop-up menu click Recycle.
- Right-click the myid.web.oauth2.pool application pool, then from the pop-up menu click Recycle.
-
Now all instances of the web.oauth2 service on different servers are using the same JWT signing key. This means that the MyID Operator Client (or any other client) can authenticate to the web.oauth2 service on any web server (that is, determined by load balancing) and can then call the rest.core web service on any web server (determined by load balancing).
Note: In this configuration, a client must still use the same web.oauth2 instance for the duration of the authentication process, as the cookies used by web.oauth2 by default are tied to an instance.
17.4.6 Setting the issuer for load-balanced systems
In the JWT tokens that web.oauth2 creates and that services such as rest.core and ProcessDriver verify, by default the Issuer claim is determined according to the web origin that the computer used to access web.oauth2; for example:
https://myidserver/web.oauth2
In cases where there are multiple MyID servers involved, or a server is accessible using multiple web origins (for example, through a load balancer, or directly accessing the server) then a mismatch of different issuer values can happen, leading to tokens not being trusted.
When this happens, the error in the relying party (for example, rest.core or MyIDProcessDriver) log contains a message similar to:
Issuer validation failed
You can address this either by setting web.oauth2 to use a fixed Issuer value, or by setting rest.core to expect an alternative Issuer value. It is recommended to control this at the web.oauth2 level rather than working around it at rest.core.
17.4.6.1 Setting the issuer in web.oauth2
To set the issuer in web.oauth2:
-
Add the issuer URL to the appsettings.Production.json file for the web.oauth2 web service.
This is the override file for the appsettings.json file, and is located in the following folder by default:
C:\Program Files\Intercede\MyID\web.oauth2\
If you do not have an appsettings.Production.json file already, you must create one, containing the following:
{
"MyID": {
"IssuerUri": "<load balancer>",
}
}where:
-
<load balancer> – the URL of the web.oauth2 service through the load balancer you are using. For example:
"IssuerUri": "https://loadbalancer/web.oauth2"
Important: This URL is case sensitive.
If the appsettings.Production.json file already exists, add the MyID:IssuerUri information to the existing file.
-
-
Reset the web server:
- On the MyID web server, in Internet Information Services (IIS) Manager, select Application Pools.
- Right-click the myid.rest.core.pool application pool, then from the pop-up menu click Recycle.
- Right-click the myid.web.oauth2.pool application pool, then from the pop-up menu click Recycle.
You can check that the intended Issuer value is set by obtaining the metadata in a browser; for example:
https://myserver/web.oauth2/.well-known/openid-configuration
17.4.6.2 Setting the issuer in rest.core
As an alternative to setting the issuer in the web.oauth2 service, you can set the issuer in the rest.core service. Note, however, that you are recommended to set the issuer in web.oauth2.
To set the issuer in rest.core:
-
Add the issuer URL to the appsettings.Production.json file for the rest.core web service.
This is the override file for the appsettings.json file, and is located in the following folder by default:
C:\Program Files\Intercede\MyID\rest.core\
If you do not have an appsettings.Production.json file already, you must create one, containing the following:
{
"MyID": {
"Auth": {
"Issuer": "<load balancer>"
}
}
}where:
-
<load balancer> – the URL of the web.oauth2 service through the load balancer you are using. For example:
"Issuer": "https://loadbalancer/web.oauth2"
Important: This URL is case sensitive.
If the appsettings.Production.json file already exists, add the MyID:Auth:Issuer information to the existing file.
-
-
Reset the web server:
- On the MyID web server, in Internet Information Services (IIS) Manager, select Application Pools.
- Right-click the myid.rest.core.pool application pool, then from the pop-up menu click Recycle.
- Right-click the myid.web.oauth2.pool application pool, then from the pop-up menu click Recycle.
17.4.7 MyID Operator Client pass-through authentication with a load balancer
When you launch a MyID Desktop or Self-Service App operation from the MyID Operator Client, it obtains an extension grant JWT from web.oauth2 which is then passed to the ProcessDriver web service.
By default, ProcessDriver uses the web.oauth2 service at the same web origin that the MyID Operator Client used to reach ProcessDriver. When a load balancer is used, ProcessDriver calls web.oauth2 through the load balancer and may end up reaching another server in the cluster.
If you set up a shared JWT signing key (see section 17.4.5, Load balancing) and set the IssuerUri (see section 17.4.6.1, Setting the issuer in web.oauth2) this will work.
However, if you do not have a shared JWT signing key configured, or the ProcessDriver web service cannot reach the load balancer's web origin, this may fail with error similar to:
85188 – Unable to connect to the authentication server
If this happens, you can configure ProcessDriver to reach web.oauth2 by specifying the following key in the ProcessDriver myid.config file:
<add key="AuthServerUrl" value="{authentication server URL}" />;
By default, this file is in the following folder:
C:\Program Files\Intercede\MyID\SSP\MyIDProcessDriver\
Note: You must include /web.oauth2 at the end of the URL; for example:
<add key="AuthServerUrl" value="https://auth.example.com/web.oauth2" />;
17.4.8 Translating the MyID Operator Client
For information about translating the MyID interface, contact customer support quoting reference SUP-138.
17.4.9 Setting the location of MyID Desktop or the Self-Service App
The MyID Operator Client can launch workflows in MyID Desktop or the Self-Service App to carry out operations that are not provided by the MyID Operator Client itself; for example, resetting PINs. By default, the MyID Client Service assumes that MyID Desktop has been installed to the default location:
C:\Program Files (x86)\Intercede\MyIDDesktop\
and the Self-Service App has been installed to the default location:
C:\Program Files (x86)\Intercede\MyIDApp\Self Service Application\
If you attempt to use a MyID Desktop or Self-Service App workflow and the MyID Client service cannot find the application, an error similar to the following appears:
OC10008 – Unable to launch the Desktop Application. Please check configuration and try again.
or:
OC10008 - MyID Client Service error
If this occurs, you can edit the MyID Client Service configuration file and provide the location of MyID Desktop and the Self-Service App.
-
Open the MyIDClientService.dll.config file in a text editor.
This file is located in the MyID Client Service program folder. By default, this is:
C:\Program Files (x86)\Intercede\MyIDClientService
-
Add the following lines to the appSettings section:
<add key="DskPath" value="C:\<Desktop install folder>\MyIDDesktop.exe"/>
<add key="SsaPath" value="C:\<SSA install folder>\Self Service Application\MyIDApp.exe"/>
where:
-
<Desktop install folder> is the folder where you have installed MyID Desktop.
-
<SSA install folder> is the folder where you have installed the Self-Service App.
For example:
<add key="DskPath" value="C:\Intercede\MyIDDesktop\MyIDDesktop.exe"/>
<add key="SsaPath" value="C:\Intercede\MyIDApp\Self Service Application\MyIDApp.exe"/>
-
-
Save the configuration file.
-
Shut down and restart the MyID Client Service.
17.4.10 Signature validation
The MyID Client Service performs signature validation of MyID Desktop before it launches the application to ensure that all components are properly signed by Intercede and have not been tampered with. These checks are performed using the native Windows APIs, and may require the client to connect to the Internet to retrieve the latest Certificate Revocation Lists (CRLs) for revocation checks of the Intercede signing certificate. If the client is permanently running in an isolated environment without access to the Internet, the CRLs cannot be retrieved, which can cause signature verification to fail.
You can disable these checks by editing the MyID Client Service configuration file.
-
Open the MyIDClientService.dll.config file in a text editor.
This file is located in the MyID Client Service program folder. By default, this is:
C:\Program Files (x86)\Intercede\MyIDClientService
-
Add the following line to the appSettings section:
<add key="ComponentVerificationSkipRevocationChecks" value="true"/>
-
Save the configuration file.
17.4.11 Fast user switching
The MyID Client Service must bind to a WebSocket port that the MyID Operator Client is aware of, but only one instance can be bound to a port at a time. By default, if the MyID Client Service detects that the current user's session is being locked, it shuts down any running MyID Client Service applets (for example, the Select Security Device pop-up window, or the MyID Document Scanner) and unbinds from the WebSocket port to allow it to be consumed in another session.
When the MyID Client Service detects the session being unlocked, it rebinds to the WebSocket port.
This allows you to use the fast user switching feature of Windows.
Note. however, that if a MyID Desktop workflow has been launched by the MyID Operator Client, the Desktop instance remains open so the workflow can be completed, although the Operator Client will not receive feedback as it becomes disconnected when the MyID Client Service unbinds from the WebSocket port.
If you do not want your MyID Client Service pop-up windows to close when you lock your workstation, you can edit the MyID Client Service configuration file.
-
Open the MyIDClientService.dll.config file in a text editor.
This file is located in the MyID Client Service program folder. By default, this is:
C:\Program Files (x86)\Intercede\MyIDClientService
-
Set the SupportFastUserSwitching line in the appSettings section to false:
<add key="SupportFastUserSwitching" value="false"/>
If this line does not exist in the configuration file, you can add it to the appSettings section.
-
Save the configuration file.
Important: When this option is set to false, if you use the Fast User Switching feature in Windows to switch to another user account while the MyID Client Service is already running means the second login cannot launch the MyID Client Service because the port has already been consumed.
17.4.12 Configuring the timeout for launching external applications
The MyID Client Service can launch other applications (for example, MyID Desktop or the Self-Service App). You can configure the length of time the MyID Client Service waits before returning an error. By default, this is 60 seconds.
You can change the timeout by editing the MyID Client Service configuration file.
-
Open the MyIDClientService.dll.config file in a text editor.
This file is located in the MyID Client Service program folder. By default, this is:
C:\Program Files (x86)\Intercede\MyIDClientService
-
Edit the following line in the appSettings section:
<add key="ExternalClientConnectionTimeoutSeconds" value="60"/>
If this line does not exist in the configuration file, you can add it to the appSettings section.
-
Save the configuration file.
17.4.13 Changing the number of buttons displayed in the button bar
By default, the MyID Operator Client displays four buttons in the button bar. You can increase or decrease the number of buttons displayed. The minimum number of buttons displayed is one; if you set the limit high enough, you can display a button for each action to which you have access.
-
On the web server:
-
Open the appSettings.js file in a text editor.
This file is located in the Operator Client web folder; by default, this is:
C:\Program Files\Intercede\MyID\OperatorClient
-
Locate the following line:
numberOfFormActionsShown: 4,
-
Change the value to the number of buttons you want to display.
For example:
numberOfFormActionsShown: 3,
-
Save the file.
-
-
On each client, close the MyID Operator Client browser window.
This ensures that the browser picks up the latest settings from the server.
-
Open the MyID Operator Client page and sign in.
17.4.14 Configuring re-authentication timeout periods
By default, MyID provides and authentication session for one hour, which can be extended at any point up to two hours after last using the MyID Operator Client, up to a limit of six days after the original authentication; see section 3.2.9, Timeouts and re-authentication.
If you want to change these defaults, you can edit the application settings file for the web.oauth2 web service.
-
On the web server, in a text editor, open the appsettings.Production.json file for the web service.
By default, this is:
C:\Program Files\Intercede\MyID\web.oauth2\appsettings.Production.json
This file is the override configuration file for the appsettings.json file for the web service. If this file does not already exist, you must create it in the same folder as the appsettings.json file.
-
In the Clients section, edit the section with a ClientID of myid.operatorclient.
If the file does not contain this client, you can copy the details from the appsettings.json file. You do not need to copy the whole section, just the options you want to change.
Important: Copy the myid.operatorclient settings to the same place (the first entry in the Clients section) in the appsettings.Production.json file as in the appsettings.json file; entries in arrays in this file are determined by their index.
For example:
Copy"Clients": [
{
"SlidingRefreshTokenLifetime": 7200,
"AbsoluteRefreshTokenLifetime": 518400,
"AccessTokenLifetime": 3600,
},
{},
... -
Set the following values:
-
SlidingRefreshTokenLifetime – the number of seconds within which you can extend the authentication. The default is 7200 (two hours).
-
AbsoluteRefreshTokenLifetime – the number of seconds after which you must re-authenticate, even if you have been continually extending the authentication. The default is 518400 (six days).
-
AccessTokenLifetime – the number of seconds for which an access token is valid after authentication. The default is 3600 (one hour).
-
-
Save the file.
-
Recycle the application pool to refresh the settings:
- On the MyID web server, in Internet Information Services (IIS) Manager, select Application Pools.
- Right-click the myid.web.oauth2.pool application pool, then from the pop-up menu click Recycle.
17.4.15 Enabling or disabling re-authentication
By default, you can extend your authentication session with the MyID Operator Client by continuing to use it; see section 3.2.9, Timeouts and re-authentication.
If you want to disable this feature, and require re-authentication whenever the session expires (by default, after one hour) you can edit the MyID Operator Client settings file.
-
On the web server:
-
Open the appSettings.js file in a text editor.
This file is located in the Operator Client web folder; by default, this is:
C:\Program Files\Intercede\MyID\OperatorClient
-
Locate the following line:
authServerScopes: "myid.rest.basic offline_access",
-
Remove the offline_access scope to disable the extension of authentication sessions.
For example:
authServerScopes: "myid.rest.basic",
-
Save the file.
-
-
On each client, close the MyID Operator Client browser window.
This ensures that the browser picks up the latest settings from the server.
-
Open the MyID Operator Client page and sign in.
17.4.16 Changing the number of Add buttons
By default, the MyID Operator Client displays up to two Add buttons; for example, you may have a customized system with different types of People you can add. If there are additional options, these are available using the ... option. You can adjust the number of displayed Add buttons; for example, you may have three different types of people, and want all three Add buttons to be visible.
-
On the web server:
-
Open the appSettings.js file in a text editor.
This file is located in the Operator Client web folder; by default, this is:
C:\Program Files\Intercede\MyID\OperatorClient
-
Locate the following line:
numberOfAddActionsShown: 2,
-
Change the value to the number of Add buttons you want to display.
For example:
numberOfAddActionsShown: 3,
-
Save the file.
-
-
On each client, close the MyID Operator Client browser window.
This ensures that the browser picks up the latest settings from the server.
-
Open the MyID Operator Client page and sign in.
17.4.17 Configuring certificate saving and printing
You can configure the behavior of MyID when using the MyID Client Service to save soft certificates or print documents.
-
Open the MyIDClientService.dll.config file in a text editor.
This file is located in the MyID Client Service program folder. By default, this is:
C:\Program Files (x86)\Intercede\MyIDClientService
-
Edit the following settings in the appSettings section:
-
AllowAutoSave – by default, true. Set to true to allow MyID to select an external drive to which it can write soft certificates, or false to prevent this.
-
AllowedSaveFileExtensions – by default, cer;pfx. Set this to a semicolon-delimited list of allowed file extensions that you can use to write soft certificates to a file.
-
AllowPrintWithoutConfirm – by default, true. Set to true to allow MyID to print a mailing document silently without confirmation, or false to prevent this.
-
EmptyDriveIgnoreRecycleBin – by default, false. Set to true to ignore the Recycle Bin when checking if an external drive is empty, or false to check the Recycle Bin. By default, Windows does not add a Recycle Bin to USB drives.
-
EmptyDriveIgnoreVolumeInformation – by default, true. Set to true to ignore the special VolumeInformation directory that Windows adds to all drives by default when checking if an external drive is empty, or false to include this drive.
If the lines do not exist in the configuration file, you can add them to the appSettings section; the format is:
<add key="optionname" value="value"/>
For example:
<add key="AllowedSaveFileExtensions" value="cer;pfx"/>
-
-
Save the configuration file.